Ethnic

Chicken Ramen with Soft Cooked Egg

Serves 2

INGREDIENTS

  • 1 chicken breast, boneless
  • Sea salt and ground black pepper, as needed, to taste
  • 1 pat unsalted butter

For the ramen broth

  • 2 teaspoons sesame or coconut oil
  • 2 to 3 coins fresh ginger, peeled and minced
  • 3 cloves garlic, peeled and minced
  • ½ cup fresh carrots, cut in matchsticks.
  • 4 Cremini mushrooms, cleaned and sliced
  • 1 ½ ounces soy sauce
  • 1 ounce mirin
  • 1 quart chicken bone broth

For finishing and serving

  • 2 large eggs
  • 2 green onions, trimmed, and green and white parts chopped
  • 2 portions (about 45 g each) dried ramen noodles
  • 1 fresh green chile pepper, sliced, or dashes of Sriracha, optional

DIRECTIONS

  1. Fill and preheat the SousVide Supreme water oven to 146F/63.5C.
  2. Season the chicken with salt and pepper to taste, top with the butter and vacuum seal; submerge in the water oven to cook for 45 minutes.
  3. Meanwhile, on the stovetop, make the ramen broth
    a. In a soup pot, heat the oil over medium heat, add the ginger and garlic and sauté until tender.
    b. Add the carrots and mushrooms and continue to cook until they are tender.
    c. Stir in the soy sauce and mirin and continue to cook another minute.
    d. Add the bone broth, cover, and bring to a boil. Reduce heat and simmer for 8 to 10 minutes. Check seasonings and adjust as needed with salt and pepper. Cover and hold warm on the lowest simmer as you continue.
  4. When the chicken is cooked, remove it from the water oven, slice it and drop it into the ramen broth to keep warm.
  5. Raise the water oven temperature to 167F/75C.
  6. When it reaches temperature, gently drop the two eggs into the water bath and cook for precisely 15 minutes. Set the timer!
  7. Meanwhile, boil a pan of water on the stove, drop the dried ramen in, and cook for about 4 to 5 minutes, until tender.
  8. Divide the cooked ramen between two bowls, top with slices of chicken and half the ramen broth.
  9. Remove the eggs with tongs or a slotted spoon when the timer sounds and let them cook just enough to handle. Crack them, just as if they were fresh, and slide a soft- cooked egg out of the shell onto each ramen bowl.
  10. Top with a scattering of green onion and the slices of pepper or hot sauce if desired.

*Adapted from a recipe courtesy of Michael Ruhlman; Photo credit Donna Ruhlman, used with permission.

Indian Butter Chicken Thighs

Serves 4

INGREDIENTS

  • 2 pounds boneless skinless chicken thighs
  • 2 to 4 cups cooked rice, for serving
  • Fresh cilantro leaves, for garnish
  • Naan, if desired

For the lime marinade

  • 1 scant ounce fresh lime juice
  • ½ teaspoon smoked paprika
  • ½ teaspoon Sriracha (or to taste)
  • 1 teaspoon sea salt

For the yogurt marinade

  • ½ cup whole milk yogurt
  • 2 tablespoons Garlic Ginger Paste (recipe follows)
  • ½ teaspoon salt
  • 1 teaspoon garam masala

For the butter sauce

  • 2 tablespoons coconut oil
  • 1 medium onion, peeled and diced
  • 1 can fire-roasted diced tomatoes and the juice
  • 1 ½ teaspoons salt
  • 1 tablespoon Garlic Ginger Paste (recipe follows)
  • 2 teaspoons smoked paprika
  • 1 teaspoon Sriracha
  • 1 tablespoon garam masala
  • 1 teaspoon ground cumin
  • 3 tablespoons unsalted butter
  • ½ cup heavy cream

DIRECTIONS

  1. Fill and preheat the SousVide Supreme to 165F/74C.
  2. In a small bowl, whisk together all ingredients for the lime marinade.
  3. Put the thighs in a pie plate or shallow dish and pour half the lime marinade over them; turn them over and pour on the remaining lime marinade, rubbing it into the flesh to ensure good coverage. Set aside.
  4. Make the Garlic Ginger Paste and have ready. (Recipe below.)
  5. In a small bowl, whisk together all ingredients for the yogurt marinade.
  6. Pour this marinade over the chicken and rub it into the flesh.
  7. Cover the pie plate with plastic wrap and refrigerate to marinate for 1 hour.
  8. Remove the thighs from the refrigerator and pat with paper towel to remove excess marinade. Put them into a gallon zip-closure cooking pouch, in a single layer, and vacuum seal; if using a suction vacuum, be careful to force the seal before any marinade creeps up into the suction ports.
  9. Submerge the pouch in the water oven to cook for 1 hour.
  10. Meanwhile, make the sauce on the stovetop in a large, heavy-bottomed soup pot.
  11. In the pot, heat the oil over medium heat; add the onion and sauté until translucent and limp.
  12. Add the diced tomatoes and salt and simmer for another 10 minutes or so.
  13. Add ½ cup water and puree until smooth with an immersion blender (or cool slightly and transfer to a blender to puree and then transfer back to the pot.)
  14. Stir in the Garlic Ginger Paste, paprika, Sriracha, garam masala and cumin.
  15. Open the pouch of thighs and pour the accumulated juices into the sauce and stir.
  16. Add the thighs to the sauce, arranging in a single layer as much as possible. Bring the sauce to a simmer and cook for several minutes more.
  17. Add the butter and continue to cook and stir, until the butter has fully melted into the sauce.
  18. Adjust seasoning with additional salt or pepper as desired and, finally, stir in the cream.
  19. Remove from the heat and garnish with cilantro leaves.
  20. Serve with cooked rice and naan.

Garlic Ginger Paste
INGREDIENTS
• 2 ounces ginger, peeled and chopped
• 14 cloves garlic, peeled and chopped
• 2 ounces water

DIRECTIONS
1. Put the ingredients into a blender and process to a smooth paste, scraping down sides as required.
2. Store the paste (for up to two weeks) in a container with a tightly fitting lid.

Mohlo a Campanha (Brazilian Tomato Condiment)

Makes about 2 cups (480 ml)

Mohlo a Companha

INGREDIENTS

  • 2 onions, peeled and diced
  • 2 green bell peppers, stemmed, seeded, and diced
  • 3/4 cup (180 ml) olive oil
  • ¼ teaspoon (1.25 ml) salt
  • 1/8 teaspoon (0.6 ml) ground black pepper
  • ½ cup (240 ml) white vinegar

DIRECTIONS

  1. Fill and preheat the water oven to 183F/84C.
  2. Put all ingredients into a small zip-closure cooking pouch and use the displacement method (Archimedes’ principle) to remove the air and zip the seal.
  3. Submerge the pouch in the water oven to cook for at least 45 minutes and up to 2 hours.
  4. Remove from the water bath and allow the pouch to cool enough to handle.
  5. Using your hands, crush the sauce through the pouch to a slightly chunky consistency.
  6. Open the pouch, stir in the vinegar, and serve as an accompaniment to roasted or grill meat, fish, poultry, or vegetables.

Chicken Quinoa Spring Rolls

Courtesy of Camille Koppenberg (Camille in the Kitchen)
Serves 2 as a meal, 4 as an appetizer

DSC_1480

INGREDIENTS
For the chicken

  • 1 chicken breast
  • salt and pepper
  • a few sprigs fresh cilantro

For the peanut sauce

  • ¼ cup (45 g) peanut butter
  • 2 tablespoons (30 ml) rice wine vinegar
  • ½ tablespoon (7.5 ml) soy sauce
  • ½ tablespoon (7.5 ml) agave nectar
  • ¼ teaspoon (1.25 ml) sesame oil
  • ½ tablespoon (7.5 ml) sambal oelek chili paste (if available, or Sriracha)

For the spring roll assembly

  • 1 package rice wrappers
  • thinly sliced sous vide chicken breast (from above)
  • 2 cups (370 g) Quinoa Sushi ‘Rice’ (recipe follows)
  • ½ avocado, peeled, seeded, and sliced thinly
  • ½ cucumber, peeled (if desired), seeded, and sliced into matchsticks
  • 2 small carrots, peeled and sliced into matchsticks,
  • 2 green onions, trimmed and chopped (about ¼ cup/57 g)
  • ½ cup (20 g) chopped fresh cilantro

DIRECTIONS

  1. Fill and preheat the SousVide Supreme water bath to 140F/60C.
  2. Liberally season the chicken breast with salt and pepper.
  3. Put the breast into a cooking pouch along with a few sprigs of cilantro and vacuum seal
  4. Submerge the pouch in the water bath to cook for 1½ hours.
  5. Remove the chicken and submerge the pouch in ice water to quick chill and refrigerate for at least 2 hours or overnight.
  6. When ready to assemble the spring rolls, make the peanut sauce in a small bowl, by whisking together the sauce ingredients. If too thick add water and if too thin add more peanut butter. Set aside.
  7. Assemble the spring rolls:
    1. Prepare your work area by laying down a damp tea towel
    2. Line a baking pan with wet paper towels (to receive the spring rolls)
    3. Pour warm water into a pie pan or shallow bowl (large enough to lay a rice wrapper flat)
    4. Dip a rice wrapper into the warm water, leaving just long enough to soften (about 1 minute).
    5. Lay the softened wrapper flat on the damp tea towel
    6. in the middle of the wrapper  center two slices of avocado and top with two pieces of sliced chicken. Top these with a spoon of quinoa, and the cucumber, carrot, green onions and cilantro.
    7. Fold the sides over the filling and roll the wrapper like a burrito, gently, but tightly. (If you rip the wrapper, it’s ok! You can double wrap.)
  8. Serve the spring rolls with the peanut sauce for dipping.

DSC_1493

Alternative: If you don’t want rolls, you can also make a delicious Chicken Quinoa Salad. For each serving, simply mound ½ cup (57 g) cooked Quinoa Sushi ‘Rice’ into a bowl, add slices of chicken and avocado, and top with sliced cucumber, green onions, matchstick carrots, and fresh cilantro.

Quinoa Sushi ‘Rice’
Makes about 2 cups (370 g)

INGREDIENTS

  • 1 cup (170 g) uncooked quinoa
  • 1 ½ cups (360 ml) water
  • ¼ teaspoon (1.25 ml) salt
  • 1 tablespoon (15 ml) rice wine vinegar
  • 1 tablespoon (12 g) sugar

DIRECTIONS

  1. Put the quinoa and water into a saucepan on the stovetop over medium high heat and bring to a boil.
  2. Reduce heat to simmer, cover, and cook for 15 to 20 minutes, until the quinoa is tender.
  3. Dissolve the sugar into the vinegar and stir this mixture into the hot rice.
  4. Allow to completely cool for using in spring rolls or in quinoa salad.

DSC_1453

Spicy Pickled Pineapple

Spicy Pickled PineappleCourtesy of Adriana Martin (AdrianasBestRecipes.com)
Makes about 4 cups (960 ml)

INGREDIENTS

  • 3 ounces (85 g) small Brazilian chili peppers*, whole
  • 2 cups (330 g) fresh pineapple, diced in chunks
  • 1 large purple onion, peeled and cut in rounds or juliennes
  • 1 teaspoon (5 ml) pickling spice
  • 1 teaspoon (5 ml) ground red pepper
  • 1 1/2 teaspoons (7.5 ml) ground pink salt (or pickling salt)
  • 1/3 cup (80 ml) apple cider vinegar

DIRECTIONS

  1. Fill and preheat the SousVide Supreme water oven to 140F/60C.
  2. Add all ingredients to a zip closure cooking pouch and use the displacement method (Archimedes’ Principle) to remove the air from the pouch and zip the seal.
  3. Submerge in the water oven and cook for 30 minutes.
  4. Remove from the water bath and quick chill, submerged in ice water, for 20 minutes. Transfer to a clean glass jar, with a tight fitting lid and refrigerate until ready to use (for up to a week.)

*Typical Brazilian varieties include: pimenta malagueta, cayenne, cumari de pere, arbol, fildalga, biquinho

Grilled Pibil Boneless Pork Ribs

Grilled Pibil Boneless Pork RibsCourtesy of Adriana Martin (AdrianasBestRecipes.com)
Serves 6

INGREDIENTS

  • 2 ounces (57 g) achiote paste
  • 1 tablespoon (15 ml) Mexican oregano
  • 1 tablespoon (15 ml) Sazon seasoning with cumin, pepper and salt
  • 1 cup (240 ml) orange juice
  • 1/2 cup (120 ml) apple cider vinegar
  • 2 cloves garlic, peeled and chopped
  • 1/2 cup (120 ml) olive oil
  • 1 pound (.45 kg) boneless pork ribs
  • 1/2 purple onion, peeled and cut in rounds
  • 1 orange, cut in rounds

DIRECTIONS

  1. Fill and preheat the SousVide Supreme water oven to 149F/65C.
  2. Meanwhile, make the pibil marinade by whisking together the achiote paste, oregano, Sazon seasoning, and orange juice in a bowl. When the paste is thoroughly dissolved, add the vinegar and whisk to combine.
  3. Put the ribs into a large zip-closure cooking pouch; add the marinade, along with the garlic and the olive oil.
  4. Use the displacement method (Archimedes’ Principle) to remove the air and zip the seal.
  5. Submerge the pouch in the water oven and cook the meat for 24 to 48 hours until tender.
  6. Prior to serving, heat a well-oiled grill or grill pan to high heat.
  7. Remove the ribs from the pouch and sear on both sides for color and flavor.
  8. Serve family style with your favorite vegetables; also delicious paired with sous vide cooked Spicy Pickled Pineapple.

Perfect Egg Tostadas

Perfect-Egg-TostadasRecipe and photograph courtesy of Adriana Martin (adrianasbestrecipes.com)
Serves 2

INGREDIENTS

  • 2 large eggs*, at room temperature
  • 2 corn tostadas
  • 2 tablespoons (30 ml) cooked black beans, warmed
  • 2 teaspoons (10 ml) salsa taquera, chile de arbol, or salsa verde sauce
  • 2 sprigs cilantro, chopped
  • 2 teaspoons (10 g) crumbled queso fresco

DIRECTIONS

  1. Fill and preheat the SousVide Supreme water oven to 162F/72C for quick cooking the eggs (or to 147F/64C for the 60 to 90 minute method.)
  2. When the bath has reached temperature, gently drop in the eggs –in their shells–directly into the water oven (no need to vacuum seal them.)
  3. If you are quick cooking the eggs, you must time them exactly, so set the timer for 15 minutes and remove them promptly. ( Have your tostada ingredients ready to plate!) If you are slow cooking them, any time after 60 minutes will work. They can stay for much longer, if needed.
  4. Once the quick cooked eggs are ready (if you are ready to plate immediately) take them out of the SousVide Supreme water oven and submerge them in cold water for a few minutes to stop the cooking process. Set aside for plating. (If using the slow cooked method at 147F/64C, you can leave them in the water bath until you are ready to plate, as they will not overcook at that temperature.)
  5. To build the egg tostadas is very easy:
    1. Put a tostada on each plate, top with 1 tablespoon of warm black beans, and spread the beans out.
    2. Carefully break the egg and gently open it on top of the beans.
    3. Drizzle with your favorite Mexican sauce.
    4. Finish the egg tostadas with chopped cilantro and crumbles of queso fresco, because a tostada without cheese isn’t a tostada, enjoy!

*Sous vide cooking of eggs depends on the circumference of the egg. This recipe’s timing is based on average ‘large’ hens eggs. If using other than large hen eggs, please see our Time and Temperature chart for properly timing egg cooking.

Filipino Adobo Pork Belly Steam Buns

…with Sweet and Sour Carrot Slaw
Recipe and photo courtesy of Camille Koppenberg (Camille in the Kitchen)

INGREDIENTS

For the pork belly

  • 1 slab of uncured pork belly
  • salt and pepper

For the Sweet and Sour Carrot Slaw

  • 2 cups (200 g) shredded carrot
  • 2 tablespoons (30 ml) apple cider vinegar
  • 2 tablespoons (30 ml) water
  • 1 tablespoon (12 g) sugar
  • salt sufficient to cover belly
  • ground black pepper to taste

For the Filipino Adobo Sticky Sauce

  • ¼ cup (60 ml) apple cider vinegar
  • 2 tablespoons (30 ml) soy sauce
  • 2 tablespoons (30 ml) water
  • 2 tablespoons (30 ml) brown sugar
  • 2 teaspoons (10 ml) sriracha
  • 1 garlic clove, smashed
  • 1 dried bay leaf

For the Steam Buns

  • 1 can refrigerated biscuits
  • Flour for dusting

For the garnish

  • 1 cucumber, thinly sliced
  • 1 bunch fresh cilantro, washed

DIRECTIONS

For the pork belly

  1. Cover the pork belly with about ½ cup of salt
  2. Put into a container and refrigerate for 12 hours
  3. After brining for 12 hours, remove the pork belly and rinse with cold water
  4. Fill and preheat the SousVide Supreme water oven to 145F/63C.
  5. Pat the pork belly dry with paper towels/kitchen paper and season with black pepper
  6. Put the pork belly into a cooking pouch and vacuum seal.
  7. Submerge the pork belly in the water oven to cook for 36 hours.
  8. After 36 hours, remove the pouch and quick chill, submerged in ice water (half ice, half water) for 30 to 40 minutes, then refrigerate for at least 8 hours.

For the slaw

  1. Combine all ingredients in a small bowl, cover, and refrigerate until ready to serve.

For the buns

  1. Roll each biscuit out on a floured surface
  2. Fold each biscuit in half to resemble a half moon and place each on an individual parchment paper square; lightly brush the biscuit with oil.
  3. Keep the biscuits covered with a moist paper towel as you go, until ready to steam
  4. Prepare your steamer (you can also use the steam function on a rice cooker)
  5. Once the steamer is ready, place each biscuit (with the parchment paper still attached) in the steamer. Make sure to leave plenty of space between biscuits, as they will expand quite a bit.
  6. Steam for 5 to 10 minutes

For the sauce

  1. While the buns are steaming, combine the sauce ingredients in a small pan
  2. Bring the sauce to a boil; reduce to simmer and allow the sauce to thicken about 5 to 10 minutes and set aside

To assemble the buns

  1. Slice the pork belly thinly (to ¼ to ½ inch/1.5 to 2.5 cm)
  2. Heat a pan over medium heat and sear the pork belly in the pan and allow the pork to crisp up on each side
  3. Once crispy, transfer each slice to the pan of sticky sauce
  4. Gently split a steam bun in half with the back of a spoon, add 1 or 2 pork belly slices to each. Top each with a couple of slices of cucumber, a couple of spoons of carrot slaw, and some cilantro.

Grilled Chicken Breast with Szechuan Yellow Bean Sauce

Grilled Chicken with Yellow Bean from Kai Mayfair
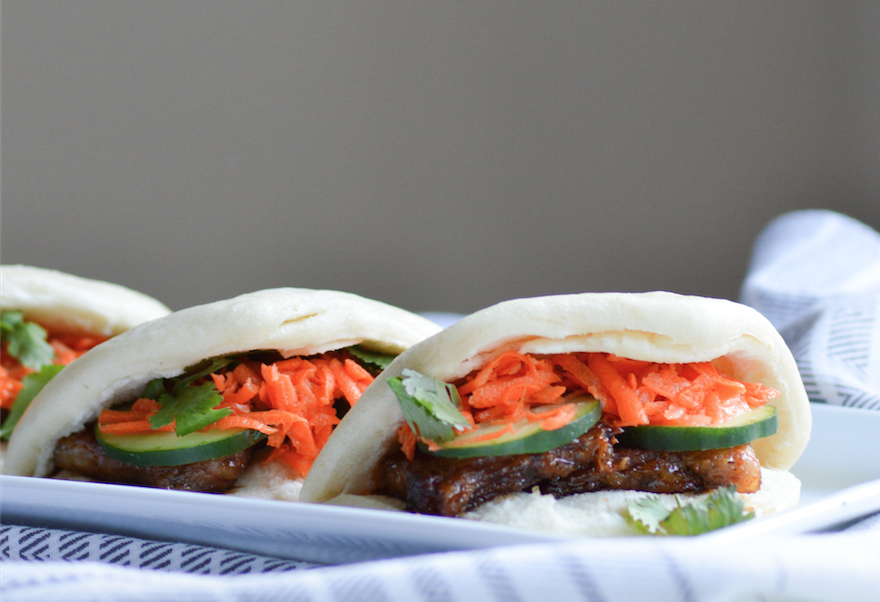
Courtesy of Alex Chow, Kai Mayfair, London, UK
Serves 4

INGREDIENTS

  • 4 chicken breasts, boneless, skin on

For the marinade

  • 2 cups (240 ml) water
  • 2 stalks celery, finely diced
  • 4 sprigs fresh coriander (cilantro), chopped
  • 4 slices fresh ginger, minced
  • 4 cloves garlic, peeled and smashed
  • 4 shallots, peeled and mashed
  • 1 teaspoon (5 ml) salt
  • 1 teaspoon (5 ml) sugar

For the yellow bean sauce

  • 9 tablespoons (130 g) unsalted butter, divided use
  • 4 shallots, peeled and sliced
  • 6 ½ ounces (200 ml) evaporated milk
  • 3 bird’s eye chiles
  • 2 teaspoons (10 ml) tau pan Szechuan chilli sauce
  • 16 ounces (500 ml) chicken stock
  • 1 tablespoon (16 g) salt or to taste
  • 1 tablespoon (16 g) fine sugar or to taste

For the garnish

  • 8 fresh mint leaves
  • 16 sliced almonds
  • 4 sugar snap peas
  • 6 cherry tomatoes, halved

DIRECTIONS

  1. In a large zip-closure bag, mix together the marinade ingredients.
  2. Add the chicken breasts and zip closed. Marinate, refrigerated, for several hours.
  3. Fill and preheat the SousVide Supreme to 146F/64C.
  4. Remove the chicken from the marinade, pat dry with paper towels, and put the breasts in a single layer into a large (gallon/3.8 liter) cooking pouch; vacuum seal.
  5. Submerge the pouch in the water oven to cook for 40 minutes.
  6. Meanwhile, prepare the garnishes:
    1. For the mint, heat a few inches of oil in a pot to 375F/190C and deep fry the mint leaves until crisp; transfer to paper towel/kitchen paper to drain.
    2. For the almonds, heat the traditional oven to 325F/160C and toast them about 2 minutes, until golden and fragrant.
    3. In the same oven, roast the cherry tomatoes in a pan with a little oil for a few minutes until the skins split.
    4. For the snap peas, on the stovetop, heat a small pan of water to the boil and blanche the peas for 30 seconds. Drain.
  7.  And make the sauce:
    1. In a pan on the stovetop over medium high heat, add a little of the butter and sauté the shallots in the foaming butter until fragrant.
    2. Add the chicken stock, remaining butter, evaporated milk, tau pan Szechuan chilli sauce, and bird’s eye chillis and simmer for about 3 minutes. Taste and adjust seasonings with salt and sugar to your liking.
  8. To finish the chicken, heat an oiled grill or grill pan to high heat and sear the chicken breast, skin side down, until brown, about two minutes. Transfer to paper towel/kitchen paper.
  9. To plate:
    1. Cut the chicken breast into square pieces and divide among four serving plates.
    2. Arrange the sugar snap peas, cooked cherry tomatoes, and bird’s eye chillies on each serving plate.
    3. Place half a mint leaf and one almond slice onto each chicken cube.
    4. Add a drizzle of yellow bean sauce onto the plate.

Masala Chai Crème Brûlée

Masala Chai Creme BruleeCourtesy of Chef Sam Hussain (caferickshaw.com)
Serves 4

INGREDIENTS

  • 3 cardamom pods, lightly split
  • 2 sticks (2 inches/5 cm each) cinnamon
  • 3 bay leaves
  • Butter for greasing ramekins
  • 2 cups (480 ml) heavy cream
  • 2 Darjeeling tea teabags (or loose tea, in an infuser)
  • 4 egg yolks
  • 4 tablespoons (48 g) sugar
  • 1 teaspoon (5 ml) pure vanilla extract
  • 4 teaspoons (20 ml) granulated or brown sugar (for finishing)

DIRECTIONS

  1. Fill and preheat the water oven to 183F/84C.
  2. Put the cardamom pods, bay leaves, and cinnamon sticks into a small muslin spice bag, if possible, or tie in cheesecloth.
  3. Generously butter the interior of the ramekins you will use and set aside.
  4. Whisk (or blend) together the cream, egg yolks, vanilla extract and sugar until blended well.
  5. Put the cream mixture, tea bags, and spice bundle into a large (gallon/3.8 liter) zip-closure cooking pouch and use the displacement method (Archimedes principle) to remove the air and zip the seal.
  6. Submerge the pouch in the water bath to cook for 30 minutes; agitate/shake the pouch half way through ensure even cooking .
  7. Remove the pouch from water bath and knead to distribute the liquid mixture evenly.
  8. With a scissors cut a small corner off the pouch and pour evenly into the prepared ramekins.
  9. Refrigerate for at least 4 hours (up to 8 hours is fine.)
  10. When ready to serve, sprinkle each serving with 1 teaspoon (5 ml) of brown sugar and caramelize with a kitchen torch or under a pre-heated broiler.

Gajar Ka Halwa (Indian Carrot Pudding)

Indian Carrot PuddingCourtesy of Chef Sam Hussain (caferickshaw.com) Serving 4

Ingredients

  • 2 1/3 cups (450 g) sugar (adjust to your taste)
  • 2 tablespoons (21 g) almonds
  • 1 teaspoon (5 ml) cardamom seeds or powder
  • 2 pounds (1 kilo) carrots
  • 36 ounces (1 liter) milk
  • 2 tablespoons (21 g) pistachios
  • 2 tablespoons (19 g) raisins
  • 2 tablespoons (29 g) ghee (clarified butter)
  • Additional raisins and nuts for garnishing

Directions

  1. Fill and preheat the water oven to 183F/84C.
  2. Wash and grate the carrots.
  3. Soak the nuts and raisins in water for 30 minutes.
  4. In a large pouch put the shredded carrots, raisins, pistachios, almond, and ghee and vacuum seal.
  5. Submerge the pouch in the water oven to cook for 2 hours
  6. Meanwhile, in a saucepan, over very low heat, warm the milk, stirring occasionally, for 1 hour.
  7. Add the sugar, mix well, and cook until the sugar has dissolved and all the milk has been absorbed into the sugar.
  8. Empty the contents of the cooked carrot pouch into the absorbed milk in the saucepan and mix well.
  9. Add cardamom and stir for another 3 to 5 minutes.
  10. Garnish with raisins, almonds, and pistachios.
  11. Serve hot, room temperature, or cold.

Tip: You can use powder milk or evaporated milk as a quick fix, instead of absorbing fresh milk; I prefer to use fresh milk for the maximum flavour.

Malabar Duck

Courtesy of Chef Sam Hussain (caferickshaw.com)
Serves 2

Malabar Duck

INGREDIENTS

  • 2 duck breasts
  • 4 teaspoons (20 g) ginger garlic paste, divided use
  • 1 teaspoon (5 ml) turmeric
  • 1 teaspoon (5 ml) coconut oil
  • 2 stems curry leaves
  • 6 ounces (200 g) shallots, peeled
  • 4 halves cashew nut
  • 12 raisins
  • 2 teaspoon (10 ml) Kashmiri chili powder
  • 2 teaspoons (10 ml) ground coriander powder
  • 1/2 teaspoon (2.5 ml) garam masala
  • 1 can (14.5 ounces/450 ml) tomato sauce
  • 3 ½ ounces (100 ml) coconut milk Salt, to taste
  • Caramelized Onions, for plating

DIRECTIONS

  1. Remove the layer of fat from the duck breasts and score the meat?
  2. In a bowl, combine 1 teaspoon (5 ml) of the ginger garlic paste with the salt and turmeric powder. Coat the breasts with the mixture, cover, and refrigerate for 30 minutes.
  3. Meanwhile, fill and preheat the water oven to 140F/60C.
  4. Put the marinated duck breasts into a cooking pouch and vacuum seal.
  5. Submerge the pouch in the water bath to cook for 2 1/2 hours.
  6. About 30 minutes before the cooking time expires, make the sauce:
    1. On the stovetop, heat coconut oil in a thick-bottomed pan over medium heat and sauté the sliced shallots and curry leaves until golden brown.
    2. Add the remaining ginger garlic paste, cashew nut, raisins and the all the remaining ground spices and cook for a minute more.
    3. Add the duck breast and sear the surface well.
    4. Add the tomato sauce, a little water and simmer to your desired sauce thickness.
    5. Finish by stirring in the coconut milk and salt.
  7. Serve the duck in a pool of sauce on a warm plate. Garnish with caramelized onions.