Ideas & Inspiration

10 Reasons You Need a SousVide Supreme

All of us at SousVide Supreme have found that sous vide cooking has become an integral part of our kitchen repertoire – not just because we work here, but because the SousVide Supreme really has changed the way we cook. If you’re still wondering what a SousVide Supreme can do that your conventional appliances can’t, here are ten reasons the SousVide Supreme can and should be your go-to kitchen appliance.

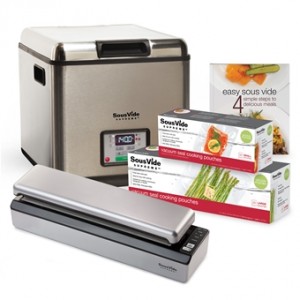
10. SousVide Supreme Looks Great On Your Counter.
Maybe it’s a little shallow, but let’s be honest: the rounded edges, the sleek lines, the brushed chrome of the Touch Plus water oven or the glossy colors of the Demi … unless you’re using a replica of Bird In Space as a paper towel holder, a SousVide Supreme is the closest thing to cooking with a work of art.

9. SousVide Supreme Makes Bad Cooks Great.
Confession: the witticist responsible for writing this blog entry was, until recently, a remarkably terrible cook. Steaks were harmed in the making of dinner, eggs were brutally mistreated, and chicken was avoided entirely for fear of undercooking it, overcooking it, or finding some way to accomplish both simultaneously. But this story has a happy ending, as so many of our stories do: acquiring a SousVide Supreme opened a world of culinary possibilities. The other night, I cooked salmon. Delicious, tender, flaky Honey Glazed Sous Vide Salmon. Before that, Chinn Chinn’s Asian Short Ribs. The SousVide Supreme has done the unthinkable: brought delicious home-cooked meals to my kitchen.

8. SousVide Supreme Means Easy Cleanup.
Sous vide cooking means a meal without a sink full of pans. Try this Sous Vide Pork Tenderloin recipe, courtesy of the blog Nom Nom Paleo, then finish it with our new kitchen torch for an easy meal with no cleanup. Silverware and plates can be used at your discretion.

7. Sous Vide Supreme Saves You Money.
To cut dinner costs, opt for a tough cut of red meat such as a flank steak. Cooking it sous vide for eight to twenty-four hours results in a steak that’s as tender as young love. Other affordable palate-pleasers include sous vide short ribs (such as these short rib recipes from Jason Wilson and Sharone Hakman) and sous vide eye round steak.

6. SousVide Supreme Makes Chicken Exciting.
Even the best home cooks may find themselves dreading yet another evening of chicken – dry, rubbery, bland chicken. The thought alone sends a cold chill up our spines. Fortunately, another night of subpar chicken can be avoided by simply cooking it sous vide. Try Lemon Chicken Sous Vide for a light chicken dish that’s anything but bland.

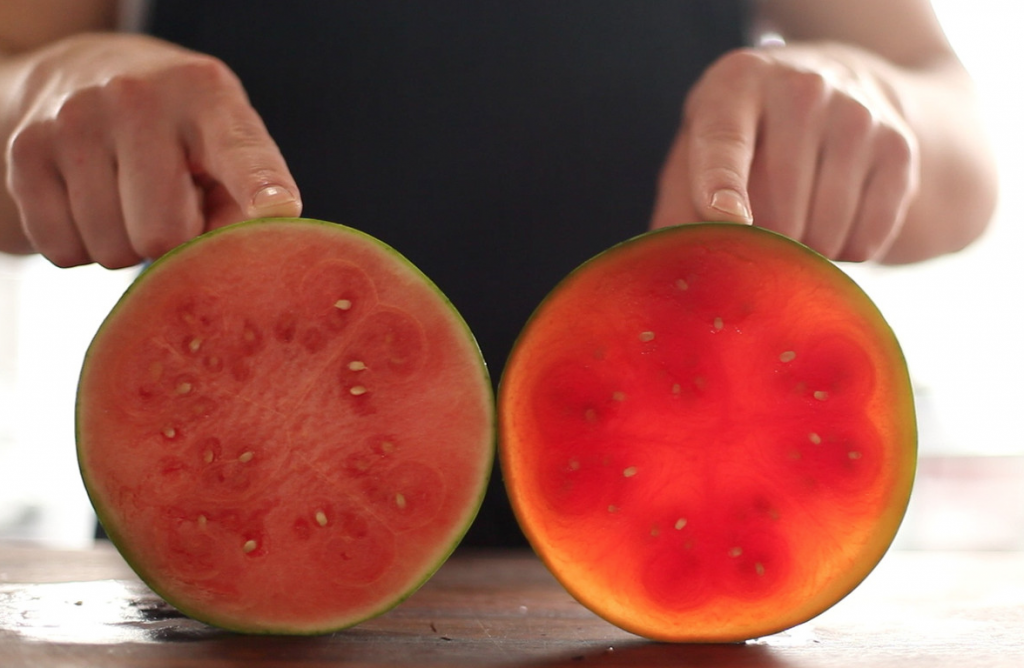
5. SousVide Supreme Keeps Veggies Nutritious.
Cooking vegetables in water – for instance, boiling – can lead to a significant loss of vitamins. On the other hand, cooking vegetables with water is a great way to keep them nutritious and flavorful. Lock in beta-carotene with our recipe for Basic Sous Vide Carrots. Give your plate some color by preparing Buttered Baby Beets and be secure in the knowledge that even kids will love them; they taste like candy! Whether you’re cooking a side dish or the main course, sous vide veggies are a revelation.

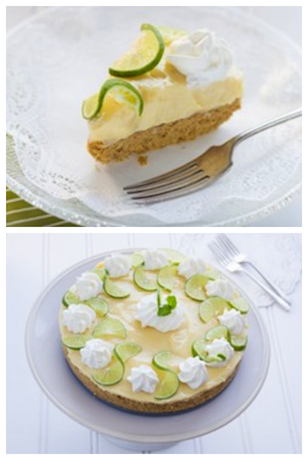
4. SousVide Supreme Lets You Cook Like A Gourmet Chef.
For years, sous vide cooking was limited to restaurant kitchens (save for the few who tried to create their own). Now that the SousVide Supreme has brought sous vide cooking out of the prep kitchen and into homes, restaurant-quality dishes are easier than ever to achieve. Our new Sous Vide Gourmet Cookbook features recipes from four world-class chefs that will have even novice cooks whipping up a fine-dining experience in the comfort of their own kitchens.

3. SousVide Supreme Makes Entertaining Easier.
Cooking for a dinner party can be tricky. All it takes is a particularly engrossing story or one glass of wine too many, and suddenly your roast is overcooked. Or worse, dinner is ready, and your chronically late friends have been “5 minutes away” for the last half hour. With the SousVide Supreme, dinner is ready when you are – whether that’s at 7:30 on the dot or when that last friend staggers through the door. Feed guests on your clock, not your meal’s, with a Sous Vide Leg of Lamb with Brussel Sprouts.

2. SousVide Supreme Means Dinner is Ready in Fifteen Hours … or 15 Minutes.

When talking about cooking sous vide, the focus tends to be on dishes that take hours to cook. And with good reason: after 24 hours, Sous Vide Pulled Pork is so tender it practically pulls itself. But there’s another side to sous vide cooking that’s often overlooked: many dishes can be ready in less than an hour. Salmon with Lemon and Dill only takes 20 minutes to cook. Your Sous Vide Ribeye Steak will be ready in 45 minutes. Sure, there are plenty of dishes that you can start cooking in the morning and have waiting for you when you get home from work, but there are just as many which are perfect for throwing in your SousVide Supreme when you get home late and just want a quick meal. And you can even cook in advance, quick chill, refrigerate, and reheat in the water bath when you get home!

1. SousVide Supreme Brings Out Your Creative Genius.
Whether you’re trying a new recipe or making your own, sous vide cooking is a great way to unleash your culinary creativity. Without the fear of overcooking, you can put all your focus on creating a delicious, unique meal. Over the past few years, all of us at SousVide Supreme have enjoyed seeing an online community of like-minded chefs develop. Whether it’s through Facebook, Twitter, or Instgram, we love to see the culinary adventures you take with your SousVide Supreme, so don’t forget to share!

Did we miss any reasons? Let us know with a comment, a tweet, or a post on our Facebook wall!

Valentine’s Day Menu

Voulez-vous sous vide avec moi, ce soir?

That’s the question of the night for those who want to whip up a romantic Valentine’s Day dinner on this day of love, as the SousVide Supreme  takes center stage as one of the hottest Valentine’s Day gifts for foodies.

To help plan the perfect day, SousVide Supreme compiled the following sous vide Valentine’s Day menu including Rosemary Beef Rib Roast, Sage Carrots, Strawberries & Cream and a Raspberry-Infused Cocktail.

GET THE WHOLE PACKAGE!

Beef Rib Roast

Serves 2 to 4

Ingredients:

  • 1-2 pounds (0.45 kg to 0.91 kg) boneless beef rib roast
  • 1 tablespoon (15 ml) fresh minced garlic
  • 1 teaspoon (5 ml) coarse (kosher) salt
  • Freshly ground black pepper to taste
  • 2 sprigs fresh rosemary, stripped of leaves, and leaves finely chopped
  • 1 tablespoon (15 ml) extra virgin olive oil
  • 2 tablespoons (28 g) clarified butter, melted

Instructions: 

  1. Fill and preheat the SousVide Supreme to 134F/56C.
  2. Mix the garlic, salt, pepper, and rosemary together and sprinkle the mixture evenly over the surface of the meat. Drizzle the olive oil over the surface.
  3. Put the roast into a large (gallon/3.8 liter) food-grade cooking pouch and vacuum seal.
  4. Fully submerge the pouch in the water oven and cook for 8 to 10 hours.
  5. Before serving, remove the roast from the pouch, pat dry; adjust seasoning with additional salt and pepper, if desired
  6. Sear the meat to caramelize the surface, either in the clarified butter in a very hot skillet or by brushing the surface with the clarified butter and searing under the broiler or with a kitchen torch.
  7. Slice and serve.

    Carrots with Sage

    Serves 4
    Ingredients:

    • 16 baby carrots, peeled and washed
    • ¼ cup (2 ounces/57 g) butter
    • 1 tablespoon (15 ml) rendered bacon fat
    • 6 fresh sage leaves
    • 1½ teaspoon (7.5 g) kosher salt

Instructions: 

  1. Fill and preheat the SousVide Supreme™ to 185F / 85C
  2. In a small skillet over medium heat, melt the butter, bacon fat.
  3. Add the sage leaves and sauté for 5 minutes; stir in the salt and cook an additional 5 minutes.  Remove the sage leaves.
  4. Toss the carrots in the seasoned butter, put them into a cooking pouch in a even layer, pour in any residual melted butter, and vacuum seal.
  5. Submerge the pouch in the water oven and cook for 1 hour.
  6. Remove from the pouch and serve.

Sous Vide Strawberries & Cream

Serves 2 to 4

sous vide champagne strawberries dessert

Ingredients: 

  • 2 cups (0.3 kg) sliced strawberries
  • 2 tablespoons (25 grams) superfine sugar (preferably) or granular sugar
  • 1/4 cup (60 ml) champagne or sparkling wine
  • fresh mint leaves, for garnish
  • whipped cream, for garnish

Instructions: 

  1. Preheat SousVide Supreme to 185F/85C.
  2. Remove the green leafy stem from the top of the strawberry and cut the berries into quarters, lengthwise, from stem end to tip.
  3. In a medium bowl, toss the berries with the sugar to thoroughly coat them.
  4. Put the berries and champagne into a large (gallon/3.8 liter) cooking pouch, spreading out evenly to fill the pouch
  5. Evacuate as much air as possible from the pouch and seal only. (Do not attempt to vacuum seal liquids with a suction vacuum sealer.)
  6. Submerge the pouch in the water bath, using the universal pouch rack to keep the strawberries below the water surface, and cook for 15 minutes.
  7. To serve, fill a martini glass or dessert dish two-thirds full with berries and top with a dollop of fresh whipped cream and a sprig of fresh mint.

 Let the romance begin!

Sous Vide Compression: Squeeze Me Sweet

Photo Credit: ChefSteps

Photo Credit: ChefSteps

Vacuum sealing is an important step in optimizing the perfectly reproducible cooking that sous vide technique offers (after all, the term sous vide itself means ‘under vacuum’). But while it’s immersion in an precision heated water bath that cooks the food perfectly, the compression itself offers advantages on its own. Compressing fruits and vegetables (and even chicken breast, but that’s another subject!) alters the texture and even appearance of the food, particularly if done with a chamber vacuum sealer that can really put the press on. Pressure makes fruits denser and sweeter and more translucent; it changes their character in interesting ways. Check out how our friends at ChefSteps explain its benefits. Don’t have a SousVide Supreme ChamberVac? You can still experience the joy of compression—if to a somewhat lesser degree–using your suction sealer. Try this:

Prep the fruit

  • Cut 1-inch/2.5 cm-thick rounds of watermelon, cantaloupe, honeydew, or pineapple, rind on; scoop out the seeds in the center, if present, and pat the surface dry with paper towels. Or use thick slices of cucumber, thin slices of tougher fruits, such as apples or pears, wedges of peaches and nectarines, or halves of strawberries instead.
  • Sprinkle both sides with a bit of balsamic vinegar and freshly ground black pepper or a dusting of vanilla sugar, whatever suits your mood.
  • Put the fruit in a single layer into vacuum pouch(es).
  • Add some citrus zest or mint leaves to the pouch(es), if desired.

Compress

  • Open the sealer and position the open end of the pouch(es) under the pouch tabs or just under the sealing portal and close and lock the lid.
  • Pick the sealer up, raising it at least a foot off the counter, and activate the vacuum seal.
  • As soon as the pouch collapses, force the seal to prevent excess moisture from entering the suction chamber.

Chill and Enjoy

  • Chill the vacuum sealed fruit to use in salads or as a cool refreshing accompaniment to grilled meats or omelettes, or as a simple dessert.

Beer Making, Sous Vide Style

We’re always on the lookout for novel and interesting ways to use our SousVide Supreme water ovens, so a recent article by Christopher Staten in Draft Magazine detailing a sous vide technique for making beer did not go unnoticed! Needless to say, we were maximally intrigued. So we reached out to the author, who kindly put us in touch with the man whose magic he’d chronicled, Karlos Knott, the head brewer at Bayou Teche Brewery. (Their Cajun brewery is situated on the family farm in Acadiana and was named by Southern Living magazine as the best brewery in Louisiana.)

Bayou Teche Brewery
In a happy bit of synchronicity, we learned Mr. Knott is a huge sous vide fan, who has had a couple of our SousVide Supreme water ovens for several years, using them almost daily for making yogurt, small test batches of new beer recipes, and cooking up Boudin and other Cajun delicacies.

At our request, he has very kindly provided us all with a pair of great, small batch sous-vide-cooked beer recipes: Sous Vide Biere, a traditional amber concoction, and a gluten-free version, called Sous Vide Pas La (Cajun French for ‘not there’). We’re going to let him tell you all about it – take it away Karlos!


Brewin’ up a Batch!
by Karlos Knott

Let me begin by saying that I love my Sous Vide Supreme water ovens and am honored to share this technique with all of you in the beer-loving, sous vide community. The water oven has really been a game changer in our family; we use it 7 days a week!  But, let’s get on to beer.

Before we get started, let me stress that the main issue with beer brewing–and it can’t be emphasized enough–is everything has to be very clean, in fact, it MUST be sterilized. Most of a professional brewer’s career is spent cleaning equipment; just a few wild bacteria or yeast can ruin a whole batch of beer. With that caution, making sous vide beer is fun and very easy to do. These two recipes are real beginner recipes, and if any of you has a question or would like to know how to do the sous vide beers using whole grains instead of syrup (which would mean a bit more equipment, time, and cost) just comment here and I’ll be glad to help you out.  So, let’s get you started.

EQUIPMENT you’ll need to gather
(available online at home brewing supplies stores)

  • 2 large (1 gallon/3.8 liter) zip-closure cooking pouches
  • 1 gallon (3.8 liter) fermenter jug with cap and airlock
  • Large wire mesh strainer
  • Funnel
  • Auto siphon with hose
  • Bottle filler
  • 12 12-ounce bottles
  • Bottle capper and caps
  • Sanitizer solution


INGREDIENTS
you’ll need on hand
(available online at home brewing supplies stores)

For Sous Vide Biere

  • 1 1/2 pounds amber malt extract syrup*
  • 7 g Cascade hop pellets*
  • 3.5 grams Perle hop pellets*
  • 0.5 ml Hopshot* (HopShot is CO2-extracted hop resin packaged in a syringe)
  • 1/2 packet US-05 dried ale yeast*
  • 12 Fizz Drop tablets*

For Sous Vide Pas La (gluten-Free beer)

  • 1 ¼ pounds sorghum extract*
  • 5 ounces honey
  • 3 ounces dried rice extract*
  • 1 ounce maltodextrin*
  • 0.5 ml Hopshot (HopShot is CO2-extracted hop resin packaged in a syringe)*
  • 1/4 ounce Citra hops*
  • US-05 dried ale yeast*
  • 12 Fizz Drop tablets*

Here’s what you’ll need to do…

Cook the wort
Mix together all the ingredients except the Fizz Drop tablets and yeast for whichever beer you’re making (for the Biere, that’s the malt extract syrup, hop pellets, and Hopshot and for the Pas La, it’s the sorghum extract, honey, dried rice extract, maltodextrin, hops and the Hopshot. (A note about the Hopshot: the amount you use can be modified, but be careful; it is pretty powerful stuff. However, if you like more bitter or hoppier beer feel free to add a bit more.) Divide the mixture evenly between two large (1 gallon/3.8 liter) zip-closure cooking pouches and add enough filtered water to each pouch to bring the total liquid up to 1/2 gallon (1.9 liters) and use the displacement method (Archimedes’ Principle) to evacuate the air and seal the pouches. Submerge the pouches in the Sous Vide water oven at 165F/73.5C for one hour. You are making what is called wort, or unfermented beer.

Sterilize the fermenting equipment

While the bag is in the water bath, sterilize the gallon fermenter jug, cap, airlock, funnel and wire mesh strainer per the Sanitizer instructions. You’ll place the funnel in the neck of the jug, with the strainer propped up in it.

Set up the fermentation 

Remove the pouches and submerge them in a sink filled with cold water to cool the wort. Keep the pouches submerged in the sink until the wort gets to approximately 60–70F/15.5-20C — the pouches will be cool to the touch. Pour both pouches of the cooled wort through the strainer and funnel setup into the fermenting jug (do not fill past the one gallon mark on the jug). Use sanitized scissors to cut open the yeast pack and pour HALF of it into the wort in the jug. (Either discard the other half or use it soon for another purpose, such as bread making.) As to the choice of which yeast to use–there are many and each gives its own special character to the beer–I would start with the US-05. It is the cleanest and gives the best results for a beginners batch, but feel free to substitute another style of brewer’s yeast in the recipes….it would still turn out awesome. Just remember to let it ferment in a fairly cool and dark place, keep everything clean and sanitized and you can’t fail!

Seal the fermenter – fill the sanitized airock with approximately 1 tablespoon/15 ml of sanitizer solution, and fit the airlock into the hole in the screw cap. Move the fermenter to a dark, cool, quiet spot until fermentation is complete – about 2 weeks.

Wait

Two weeks after Brew Day, your beer is ready to bottle. Note: you’ll want a helper around for the filling step!

Sterilize the bottling equipment and bottle your beer

Get everything ready to bottle. Sanitize the auto-siphon’s hose, bottle filler, about a dozen each of 12-ounce bottles and bottle caps. Connect one end of the hose to the auto-siphon and the other end of the hose to the bottle filler. Remove the airlock and stopper from the jug and place the auto-siphon into the beer; while holding down the bottle filler to keep the valve open, have your helper pull up, then push down on the siphon piston to begin the flow of beer. Just lift up on the filler to stop the flow of beer. Try to leave about 1 inch (2.5 cm) of headspace in each bottle.

Add one Fizz Drop tablet to each bottle. This is a small charge of sugar and will carbonate the beer. To cap the bottles, put a sanitized bottle cap onto a filled bottle. Center the bell of your bottle capper on the cap and push down on the levers, then release. Put the now-filled bottles in a dark and cool spot for 10 days.

Wait some more…then try one out!

While you’re waiting for your beer to develop its character, treat yourself to a visit to a nearby independent brewery — you’ll especially enjoy it now that you know the care and passion that it takes to craft a beer. We encourage y’all to support your local brewers; these guys and gals work hard to bring a fine, locally-crafted product to your beer market as the little Davids among the Goliaths of the gigantic beer industry.

After 10 days, it’s time to test it out.  Put one of your beers upright in the fridge and let it chill well. Pry off the cap and you should hear a nice pop and hiss (typical of the same sound as a commercially-brewed beer). Drink the beer! If not quite carbonated enough, allow the other bottles to stay at room temperature another week, then chill upright and enjoy.

One thing to note is you are brewing a bottle conditioned beer. There will be a small amount of yeast that settles on the bottom of the bottle during carbonation. This is natural. To enjoy, store your beers upright in the fridge and pour slowly out of the bottle into a glass, leaving behind the yeast sediment in the bottle.

Enjoy or as we say in Louisiana Santê!

Preparing for Fall Dinners

There are certain universal benchmarks which remind us that yes, fall is upon us. The days get shorter, mornings are crisper, school supplies are in demand, and blog writers can’t help but make obvious statements about fall.

The change in seasons also marks a change in what we eat. As cooler weather sets in, there is little more comforting than a warm, hearty meal such as a stew or soup. Unfortunately, cooking a good stew on a stovetop or in an oven can be an involved process – the ingredients must be periodically stirred and the pot must be watched to ensure it doesn’t boil. Even experienced cooks often find themselves eating an overcooked stew with dry, tough meat.

Sous vide stews and soups, on the other hand, mean that dinner will be ready whenever you are, with fork-tender meat no matter how long it cooks. Stews and soups are perfect make-ahead meals, ideal for nights when you want a home-cooked meal but don’t want to be stuck cooking as soon as you get home. There are many great recipes out there for soups and stews, but here are some of our favorites:

The ingredients for the Sous Vide Beef Goulash can be prepared the night before and will be ready for the following night’s dinner. The Traditional Irish Lamb Stew Sous Vide is a hearty meal that can be prepared in the morning and serve six that evening. Large batches of Meat Week (Chicken) Soup can be cooked then quick-chilled, to be reheated for easy lunches at work.

Of course, if soups and stews aren’t your meal of choice (we once heard soup described as being “too wet”), there are plenty of other perfect-for-fall recipes available in our recipe section.

Do you have a favorite fall recipe, stew or otherwise? Share it in our comments section or on our Facebook page. And don’t forget to tweet us a pic of your finished creation, @SousVideSupreme!

Key Lime Pie

There is nothing quite like home-made key lime pie.

Key Lime Pie

It’s the perfect summer dessert, tart and creamy with a buttery crunch. I also love the sunny yellow color of this dessert. You could make it with normal Persian limes, but key limes really give this tart that distinctive and delicious edge. Some key lime pies are covered with a meringue topping; however I prefer fresh cream which complements the tart lime flavor so well. The original recipe for key lime pie did not require any cooking.

The lime juice mixed with the egg yolks caused the proteins to coagulate and thicken naturally. Nowadays, we are more concerned about the dangers of consuming raw eggs, so key lime pies are cooked in the oven for a short time. However, cooking key lime pie in a conventional oven, usually means cooking at a high temperature.  The beauty of cooking key lime pie filling in a SousVide Supreme is that it can be cooked at a lower and very precise temperature. This ensures that the key lime filling is perfectly cooked through and retains that silky, creamy texture.  This key lime pie is a cinch to make. The hardest part is juicing all those tiny key limes! It’s worth it though, as fresh key lime juice is way nicer than anything from a bottle.  This key lime pie is a stunner and sure to impress your guests.

Ingredients

For Key Lime filling

  1. ½ cup (118 ml)of key lime juice, from fresh key limes
  2. 14 oz (396 g) can of sweetened condensed milk
  3. 4 egg yolks

Key Lime Pie

For the crust

  1. 1 teaspoon  (5 g) of butter , to grease tin
  2. 6 tablespoons (85 g)of butter, melted
  3. 1 ½ cups (150 g) of graham cracker crumbs
  4. 2 tablespoons (30 g) of granulated white sugar

For the topping

  1. ½ a cup  (118 ml) of heavy whipping cream
  2. 2 extra key limes for decorating

Directions

  1. Fill and preheat the SousVide Supreme to 180°F/82°C.  Put the lime juice, condensed milk and egg yolks into a medium-sized bowl. Stir together with a spoon/ small hand whisk, until all ingredients are well combined.
  2. Place a large (gallon/3.8 liter) zip-closure cooking pouch into a baggy rack. I find this gadget invaluable when I need to pour any liquid into a bag. If you don’t have a baggy rack, you can always ask someone to hold the bag open while you pour in the contents.  Pour the egg mixture into the large (gallon/3.8 liter) zip-closure cooking pouch, and use the displacement method (Archimedes’ principle) to remove the air and zip the seal closed. Once the seal is zipped closed, submerge the pouch in the preheated water bath and cook for 30 minutes.
  3. Meanwhile you can make the graham cracker crust. Grease an 8 inch (20 cm) round spring form tin / pie dish with a little butter.  In a large bowl, mix together the graham cracker crumbs, sugar and melted butter with a spoon. Pour the crust mixture into the prepared tin / pie dish.  Using the back of a spoon, gently press the crust into the base of the tin.  Make sure it is even, and then place the crust into the fridge to harden.
  4. After thirty minutes, remove the pouch from the SousVide Supreme. Open the zip seal and using a spoon, give the mixture a quick stir. Then, simply pour the key lime filling onto the hardened graham cracker crust. Allow to cool for about thirty minutes before transferring to the fridge to cool further. I like to leave my key lime pie cool in the fridge for about two hours, to let all the flavors develop.
  5. To decorate the key lime pie, beat the heavy whipping cream with electric beaters until it forms soft peaks.  Place the whipped cream into a piping bag with a medium sized nozzle.  Pipe small circles of cream around the edge of the cake, and one large circle in the center. Place thin slices of key lime on top of the pie.


Five-Course Sous Vide Cooking Experience with SousVide Supreme and Vivian Peterson


Guests take hands-on direction from Chef Vivian Peterson to prepare dishes for a five-course meal

Guests take hands-on direction from Chef Vivian Peterson to prepare dishes for a five-course meal

On May 29, SousVide Supreme joined forces with The Velvet Underground Dining Experience (VUDE) in Seattle to host a sous vide cooking class and dinner.

Chef Vivian Peterson led guests in a dynamic, hands-on, 3-hour class on the sous vide technique, culminating in a five-course sous vide meal, complete with wine pairings from Hand of God Wines. The menu for the evening included sous vide Copper River salmon, potatoes au gratin, and poached pear in spiced red wine. View more photos from the event here.

Recipes from the class, to your kitchen:


10 Great Reasons to get a SousVide Supreme

Sous vide … You’ve heard it mentioned on cooking shows and you suspect your favorite steak restaurant has been cooking sous vide behind those closed kitchen doors. Perhaps you are tempted to try this whole sous vide thing out for yourself. So, if you are on the fence and toying with the idea of buying a SousVide Supreme, here are just a few reasons why your home needs one.

SousVide Supreme Gives You Incredible, Perfectly Cooked Food

1. The SousVide Supreme makes incredible, perfectly cooked food. The SousVide Supreme allows you to cook at a very precise temperature, making it virtually impossible to overcook or undercook your food. Conventional ovens or stove top cooking requires an amount of skill (or guesswork) that is totally eliminated with SousVide Supreme. For a steak that is guaranteed medium-rare, simply set the device to 134°F/ 56.5°C. As the temperature is so precise, the meat will be cooked the same all the way through. So, no more dry edges or rare centers. Another great advantage is, if your guests are late, you can leave the steak in the water bath for hours – it will stay the exact same temperature and will still be medium rare. Do you need any more reasons than that to get one?


Cooking is Simple and Consistent with SousVide Supreme

2. The SousVide Supreme is simple and consistent. We all have bad days in the kitchen- food gets burned and tempers get frayed. As the SousVide Supreme has a very precise temperature guage, it’s really very hard to mess up. If you aren’t a very good cook – not a problem! Sous vide is as simple to use as a microwave. You put your packaged food in, set the timer and once the bell rings, your food is ready to eat.


sous vide cooking gives you incredible, perfectly cooked food

3. The SousVide Supreme makes healthier and more nutritious food. Cooking food in a vacuum pouch means that all the natural juices and vitamins are retained. They aren’t boiled off or steamed away like in conventional cooking. Food cooked in the SousVide Supreme retains its color and form. You don’t need added butters and oils to moisten dry meat or vegetables anymore. Everything cooked with the SousVide Supreme is perfectly delicious on its own. Natural flavours are enhanced with this type of cooking. Dry gritty meats and limp discolored vegetables can become a thing of the past.


SousVide Supreme is a lean, green machine

4. The SousVide Supreme is a lean, green machine. This device will use very little electricity compared to most of your kitchen appliances. Once heated to temperature it uses about the same amount of electricity as a 60W bulb. It’s also very well insulated which means your kitchen won’t feel like a furnace when you’re cooking on a hot summer’s day.


SousVide Supreme Saves You Money

5. The SousVide Supreme will save you money. The SousVide Supreme makes flank steak taste like filet mignon. By cooking meat in a closed vacuum pouch; it creates a humid environment that essentially braises the meat. It can turn cheap cuts of meat into a five-star meal. This means a huge saving on your butcher’s bill.


 Less Dirty Dishes with SousVide Supreme

6. The SousVide Supreme will mean fewer dirty dishes. Sometimes life is just too busy, and you don’t have the time or energy to wash pots and pans. With the SousVide Supreme, you can make a perfectly cooked chicken breast, which is moist and tender, and have very little washing up to do afterwards. You could sear it for a few seconds in the pan, or you could eat it straight away in a warm chicken salad, meaning all you need to clean is your salad bowl.


SousVide Supreme Makes Meal Planning Easy

7. The SousVide Supreme helps meal planning. If you are cooking something like salmon steaks or lamb chops, why not cook six extra for use another time. Then all you need do is quick chill and freeze them. This way, you can pluck that ready cooked meat (fish, chops, steak, roasts, or poultry) from the freezer whenever you need it.


SousVide Supreme Makes Gourmet Cooking Look Easy

8. The SousVide Supreme makes gourmet cooking easy. Some recipes, like home-made custard, crème brulee, or béarnaise sauce are just too finicky and time consuming to make at home. They are hard to get right and there is nothing worse than making custard that is a curdled mess. However with the Sous Vide Supreme, it’s effortless to make these types of recipes. You can make flawless custards, impressive butter sauces and home-made ice-cream bases without breaking a sweat.


Impress Your Guests and Entertain Easy with SousVide Supreme

9. The SousVide Supreme will impress your guests and make entertaining a breeze. Sometimes it’s hard not to get caught up in a conversation, and suddenly dinner is ruined. With the SousVide Supreme you can have dinner cooked and ready to go before your guests even arrive. Plus it will stay perfectly cooked, so you can enjoy the evening. When guests taste your sous vide cooked food, they are going to be impressed. In fact, you might find that all talk around the dinner table will revolve around the SousVide Supreme. You can be pretty sure that by the end of the night, they will all want one too. One commenter wrote to us and said, ‘I never get tired of hearing my guests say it is the best meal they’ve ever eaten!’


Unleash Your Creative Genius with SousVide Supreme

10. The SousVide Supreme will unleash your creative genius. It’s so versatile, the possibilities are endless! With this device, you can make infused spirits, such as Limocello. You can temper chocolate like a pro, and make all your food taste like it came straight from a fine dining restaurant. The SousVide Supreme will make you feel like a culinary professional in your own home.

Salty Seattle’s Frenched Rack of Pork – YUM!

It’s comfort food weather and nothing is more comforting than savory slow-cooked pork and apples. We recently ran across this recipe from the Salty Seattle blog that made our mouths water.

BBQ Beef Burger with Cipollini Onions and Blue Cheese

Blue Cheese Burger

Give dad a break from the barbecue this Father’s Day and wow him with your grill skills thanks to SousVide Supreme.

Barbecue can be intimidating – will the meat be cooked enough or will it be burned to a cinder? How do I know when my burger is cooked without slicing into it and spilling all those lovely juices? Well, thanks to the SousVide Supreme all the guess work is eliminated. You can cook your burger to perfection in advance and keep warm in the water bath until your guests arrive. Then, all the burger needs is a quick flash on a hot grill and they will be perfectly cooked every time. It’s your secret weapon to becoming master of the grill.

This delicious burger with salty blue cheese and soft sweet cipollini onion is sure to melt your dad’s heart. I cooked the burger medium rare in my SousVide Supreme, then seared on the barbecue to get that lovely smoky flavor. I cooked the sweet cipollini onions in the SousVide Supreme until they were meltingly tender. I then charred them for a few seconds on the barbecue. Cipollini onions this sweet, tender and still robust enough for barbecuing could never be achieved without the SousVide Supreme. Barbecued burgers are so often dry and gritty. The SousVide Supreme cooks burgers at a precise and consistent temperature, so that they are evenly cooked and retain all their juices. A sous vide barbecue burger is like no burger you’ve tasted before.

The SousVide Supreme takes all the worry out of barbecuing. If your guests are late, you can still enjoy the day, knowing that your perfectly cooked burgers are waiting in the water bath for when they arrive. You can guarantee that your barbecued food –whether burgers, ribs, chicken, fish or veggies won’t be overcooked or underdone. In fact, dad might be so impressed that he hands you over the barbecue tongs for good!

Sous Vide BBQ Beef Burger with Cipollini Onions and Blue Cheese
Serves 2

Sous vide cooking time 60- 90 minutes for the burgers, plus 35 minutes for the onions

Ingredients:

Onions

  • 6 cipollini onions
  • 1 tablespoon (14 g) butter
  • ¼ teaspoon (1.25 ml) pepper
  • ¼ teaspoon (1.25 ml) smoked salt

Burger

  • 1/2 pound (8oz / 227g ) ground sirloin
  • ¼ teaspoon (1.25 ml) pepper
  • ¼ teaspoon (1.25 ml) smoked salt

Extras

  • ½ tablespoon (7.5 ml)  oil with a high smoke point
  • 2 burger buns
  • 1 tablespoon (15 ml) mayonnaise
  • 2 lettuce leaves
  • 1/2 cup (2oz/50g) of blue cheese
  • ½ Beefsteak tomato cut into two thick slices
  1. Fill and preheat the water in the SousVide Supreme – 185 °F (85°C). Top and tail the cipollini onions and remove the skin with a paring knife. Place the prepared onions into a small (quart /0.95 liter) food-grade cooking pouch in a single layer. Add the butter, salt and pepper to the cooking pouch, and then vacuum seal the pouch. Once the SousVide Supreme has reached the set temperature, submerge the pouch into the water bath and set the timer for 35 minutes.
  2. After 35 minutes, remove the pouch from the water bath. Place the pouch in a bowl of iced water until you are ready to barbecue them later.
  3. Next, place the ground meat, salt and pepper into a bowl. Using clean hands form the meat into two equal sized patties. Place the burger patties on a large plate and cover with cling wrap, then place them in the freezer for 1 -2 hours. I freeze them before putting them in a vacuum seal bag, as the burgers keep their shape better when they are frozen.
  4. Set the water temperature in the SousVide Supreme for the burger – 134 °F (56.5 °C) for medium rare; 140°F (60 °C) for medium; 150 °F(65.5 °C) for well-done.
  5. Once the patties are firm and frozen, place them in a large (1 gallon / 3.8 liter) food-grade cooking pouch in a single layer and seal using a vacuum sealer.  As soon as the water has reached the right temperature, submerge the pouch in the SousVide Supreme and cook for 60- 90 minutes.
  6. While you are waiting for the burgers to cook, you can prep the other ingredients. Slice the blue cheese, cut the tomatoes, wash and dry the lettuce, and put them in the fridge until you are ready to serve.  Preheat the grill to high heat.
  7. Once the burgers are cooked, remove from the cooking pouch and pat them dry with kitchen paper (paper towels). Remove the cippolini onions from their pouch and pat dry. Brush the burgers and the onions with a little oil and then sear them on a hot barbecue grill. I like to toast my burger buns on the grill at the same time. Once the burgers and onions are nicely seared on both sides, take them off the heat. Place the bottom burger bun on a plate, cover one side with mayonnaise, tomato, lettuce, and then place the burger on top.  Slice the cipollini onions in half and arrange over the burger with the blue cheese. Close the burger bun and serve.

Easter & Passover Sous Vide Recipe Roundup

Easter & Passover Sous Vide Recipe RoundupWith Good Friday and Easter Sunday falling on the same weekend as Passover this year, the coming weekend promises to be a busy one full of good food and guests. But even with a packed holiday weekend approaching, there’s always room for some sous vide in your kitchen. Here are some of our Easter and Passover-approved recipes that will wow you guests … with lots of egg recipes, of course!

  • Using your SousVide Supreme to color Easter eggs will quickly become one of your favorite tricks. Keep your hands and counters dye-free by using our zip pouches to dye the eggs.
  • Homemade gefilte fish is a rarity these days. Good homemade gefilte fish is even rarer. You’re guaranteed a delicious hit with Yair Feinberg’s recipe for Gefilte Fish Sous Vide.
  • Easter & Passover Sous Vide Recipe Roundup Serve up a delicious Easter Ham and Egg Scramble Sous Vide to your guests if you’re having company for Easter brunch. Or turn brunch into a Sous Vide Omelette Party by letting your guest make their own omelettes.
  • Lamb is a traditional part of both the Passover and Easter meals. Create a flavorful dish that will keep your guests talking till next year with the Herb Roasted Spring Lamb Loin Sous Vide.
  • Whether you’re dashing through the garden or just observing the organized chaos, it’s important to be well-fueled for that Easter egg hunt. The Perfect Sous Vide Eggs Benedict will give you the energy you need to keep pace with even the most enthusiastic egg-hunters.
  • It’s easy to overlook the hardboiled egg on a seder plate because it feels so mundane. Make even your hardboiled egg serve as a reminder of why this night is unlike all other nights by hardboiling the egg sous vide.


These aren’t our recipes, but we’re pretty crazy about them:

  • A poster over at Cooking Sous Vide bought a semi-cooked supermarket smoked ham and cooked the ham sous vide. The results were so good, the poster concluded, “You will never, ever bake another ham, I guarantee.”
  • Don’t let the lamb shanks from your seder go to waste! Cook them sous vide, then create Sous Vide Lamb Shank Wraps – minus the pita, of course, if you’re observing Passover.


If all these recipes aren’t enough for you, two years ago we compiled a huge post of great egg recipes from amazing food blogs like Serious Eats and Sleepless Foodie. Check out our High-Tech Easter Eggs post for tons more egg-centric recipes!

Udon with 36-hour Pork Pelly

Longing for something light, but savory, that won’t heat up the house in the hot weather? Try this delicious recipe for Udon with 36-hour Pork Belly, brought to us courtesy of the culinary genius of Stephane Lemagnen of the Zen Can Cook blog.

The belly cooks for 3 days–yes, 3 days–but unlike traditional cooking methods, the SousVide Supreme won’t heat up the kitchen doing it! The water oven rapidly heats up and then maintains hour after hour and even day after day using no more energy than a 60 watt light bulb. It’s the most energy efficient way to cook, which is especially nice if the electric bill is going sky high already from the a/c!